Building a JHipster Vue Admin

Jhipster is a development platform to quickly generate, develop and deploy modern web applications and microservices architectures. In this article I will describe how to build the foundations of a Vue Admin container built using JHipster.
For the first part of setting up the base JHipster installation I will draw on this excellent tutorial on creating a Micro Frontends project by Matt Raible:
https://auth0.com/blog/micro-frontends-for-java-microservices/
Software component versions:
- Java 21.0.3
- Node 20.15.0
- JHipster 8.6.0
- Docker Desktop
In this tutorial we will cover the following milestones:
- Milestone 1: Use Jhipster to generate micro services application
- Milestone 2: Configure Docker files and configurations and start up databases
- Milestone 3: Enable Zero Turnaround UI development
- Milestone 4: Configure the front-end app
- Milestone 5: Update the Nav Bar
- Milestone 6: Add example pages and configure the router
- Milestone 7: Add side menu-bar
- Milestone 8: Configure Micro-Frontend integration into menu
- Milestone 9: Add the Admin menu section
- Milestone 10: Tidy up
The full code for the application can be found here: https://github.com/FrancoisBotha/jhipstervueadmin
Milestone 1: Use Jhipster to generate micro services application
This includes Consul, Gateway, Demo App and Store micro services.
The JHipster application is specified and configured in the jdl below:
application {
  config {
    baseName gateway
    reactive true
    packageName au.com.businessautomationtechnology.gateway
    applicationType gateway
    authenticationType jwt
    buildTool maven
    clientFramework vue
    prodDatabaseType postgresql
    serviceDiscoveryType consul
    testFrameworks [cypress]
    microfrontends [demoapp, store]
  }
}

application {
  config {
    baseName demoapp
    reactive false
    packageName au.com.businessautomationtechnology.demoapp
    applicationType microservice
    authenticationType jwt
    buildTool maven
    clientFramework vue
    prodDatabaseType postgresql
    enableHibernateCache false
    serverPort 8081
    serviceDiscoveryType consul
    testFrameworks [cypress]
  }
  entities Blog, Post
}

application {
  config {
    baseName store
    reactive false
    packageName au.com.businessautomationtechnology.store
    applicationType microservice
    authenticationType jwt
    buildTool maven
    clientFramework vue
    prodDatabaseType postgresql
    enableHibernateCache false
    serverPort 8082
    serviceDiscoveryType consul
    testFrameworks [cypress]
  }
  entities Product
}

entity Blog {
  name String required minlength(3)
  handle String required minlength(2)
}

entity Post {
  title String required
  content TextBlob required
  date Instant required
}


entity Product {
  title String required
  price BigDecimal required min(0)
  image ImageBlob
}

relationship ManyToOne {
  Post{blog(name)} to Blog
}


paginate Post with infinite-scroll
paginate Product with pagination

deployment {
  deploymentType docker-compose
  serviceDiscoveryType consul
  appsFolders [gateway, demoapp, store]
  dockerRepositoryName "francoisbotha"
}
Run:
jhipster jdl application_def_jva.jdl
Jhipster will use the settings defined in the above jdl file to genarete our base application. When completed, you should see the screen below:

Milestone 2: Configure Docker files and configurations and start up databases
Some useful Docker commands for this milestone:
List all docker containers:
docker ps -a
Stop all running containers:
docker stop \$(docker ps -q)
Remove all stopped containers:
docker rm \$(docker ps -a -q)
First, start the Consul server:
cd gateway
docker compose -f src/main/docker/consul.yml up -d


Next, update Postgresql port numbers for databases used by gateway and micro services:
ports:
- 127.0.0.1:5433:5433
Gateway: 5434
Store: 5435
DemoApp: 5436
For example, to update the "Store" microservice, we update the docker file as follows:
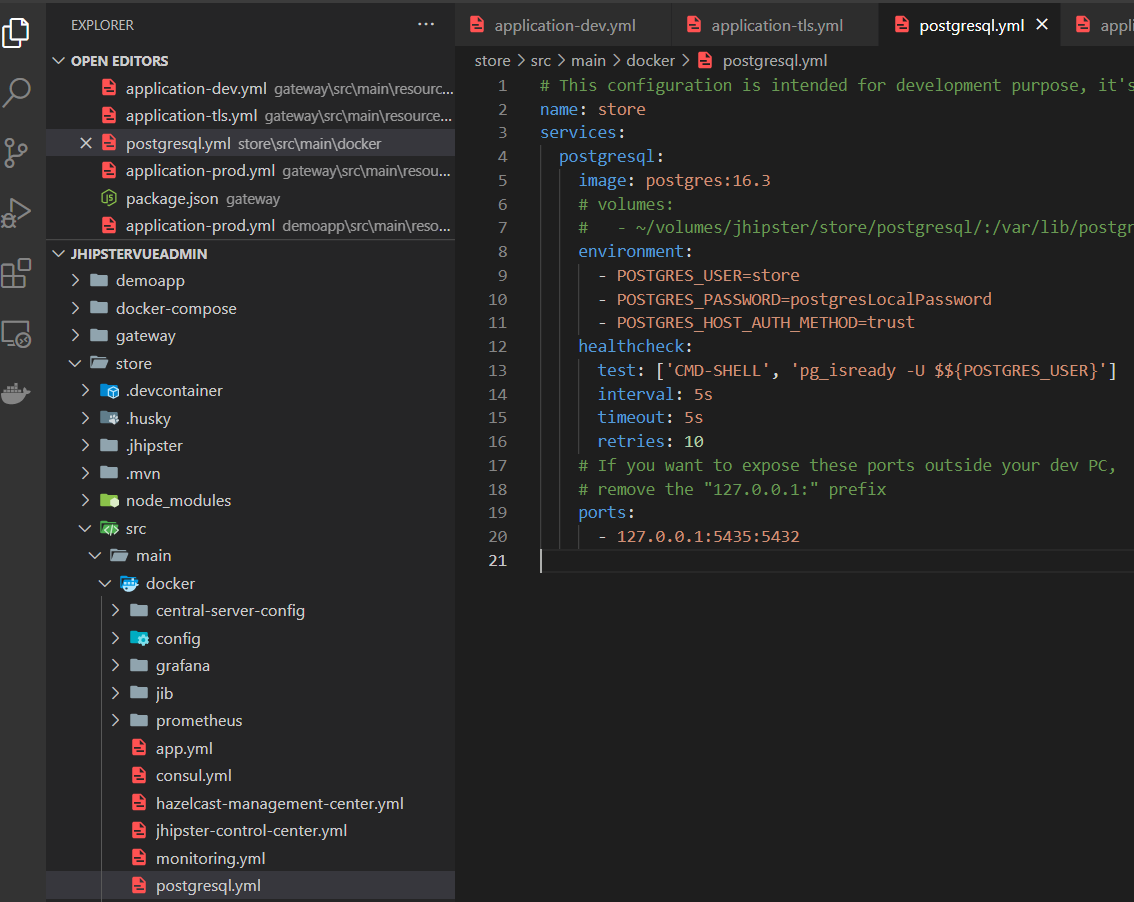
(Remember to add the password)
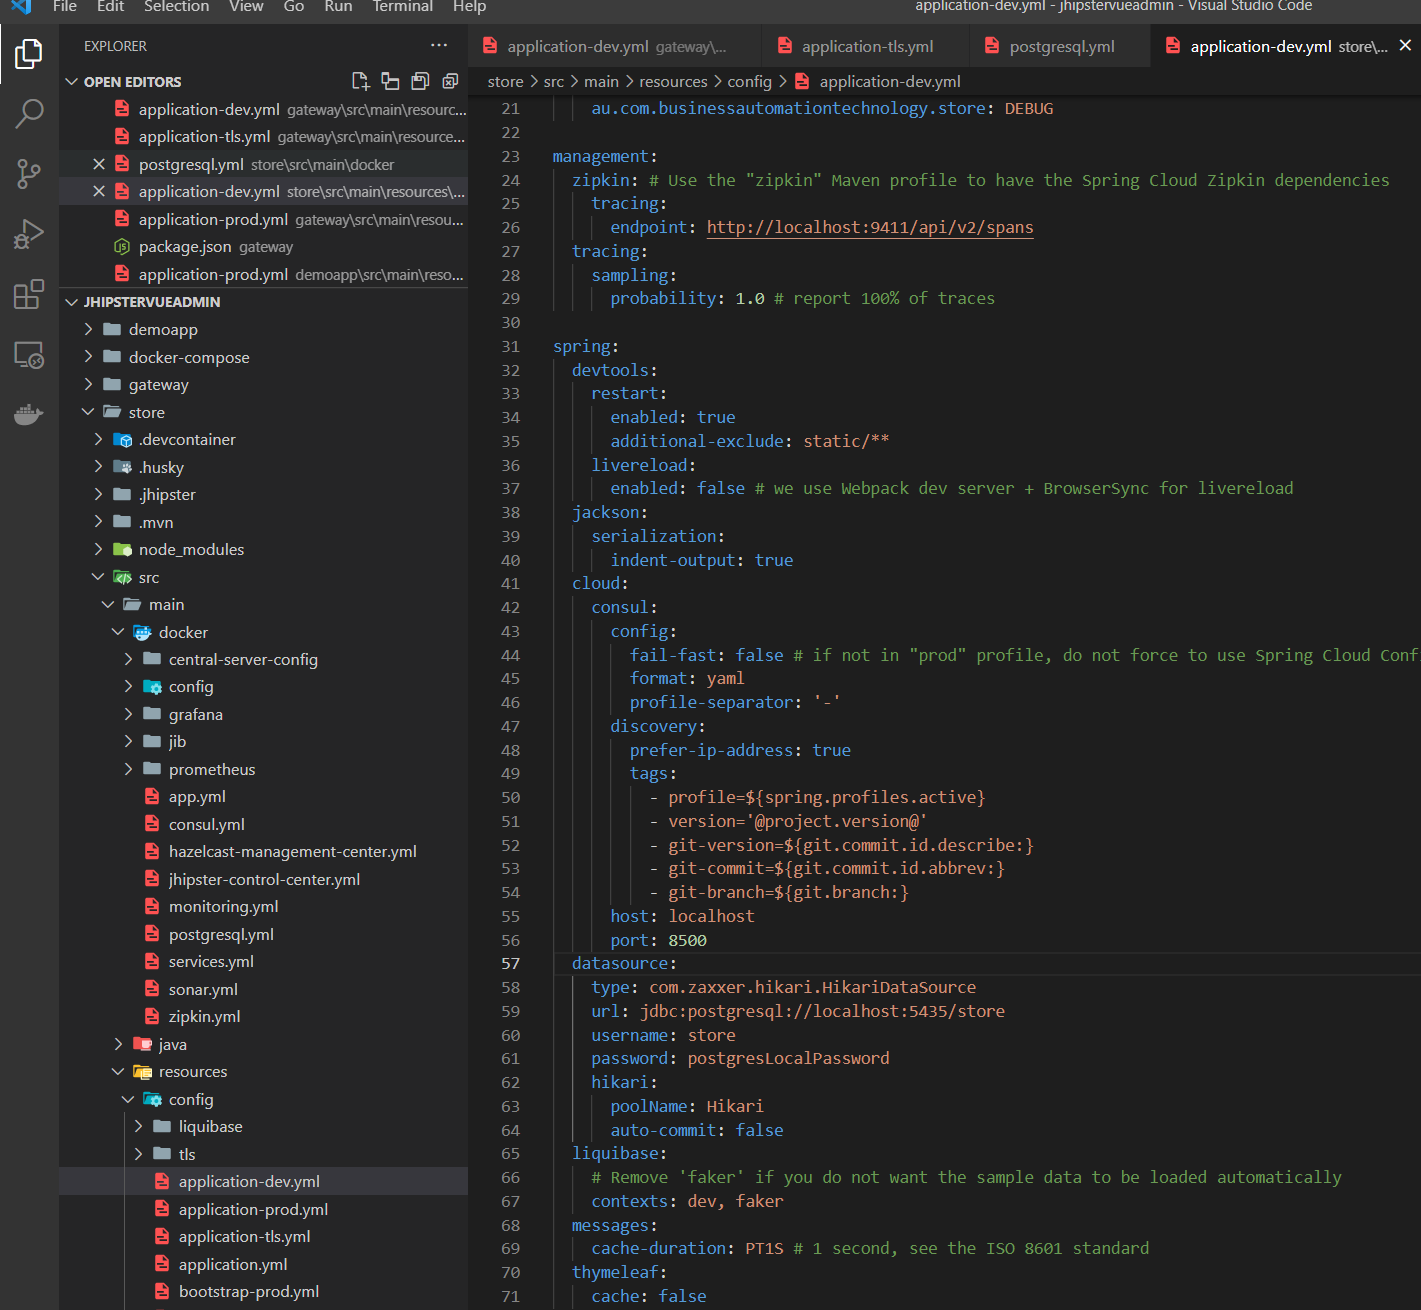
Then update the application-dev.yml properties file, adding the connection url and the password:
Now start the database:
cd store
docker compose -f src/main/docker/postgresql.yml up -d
This will start the docker container: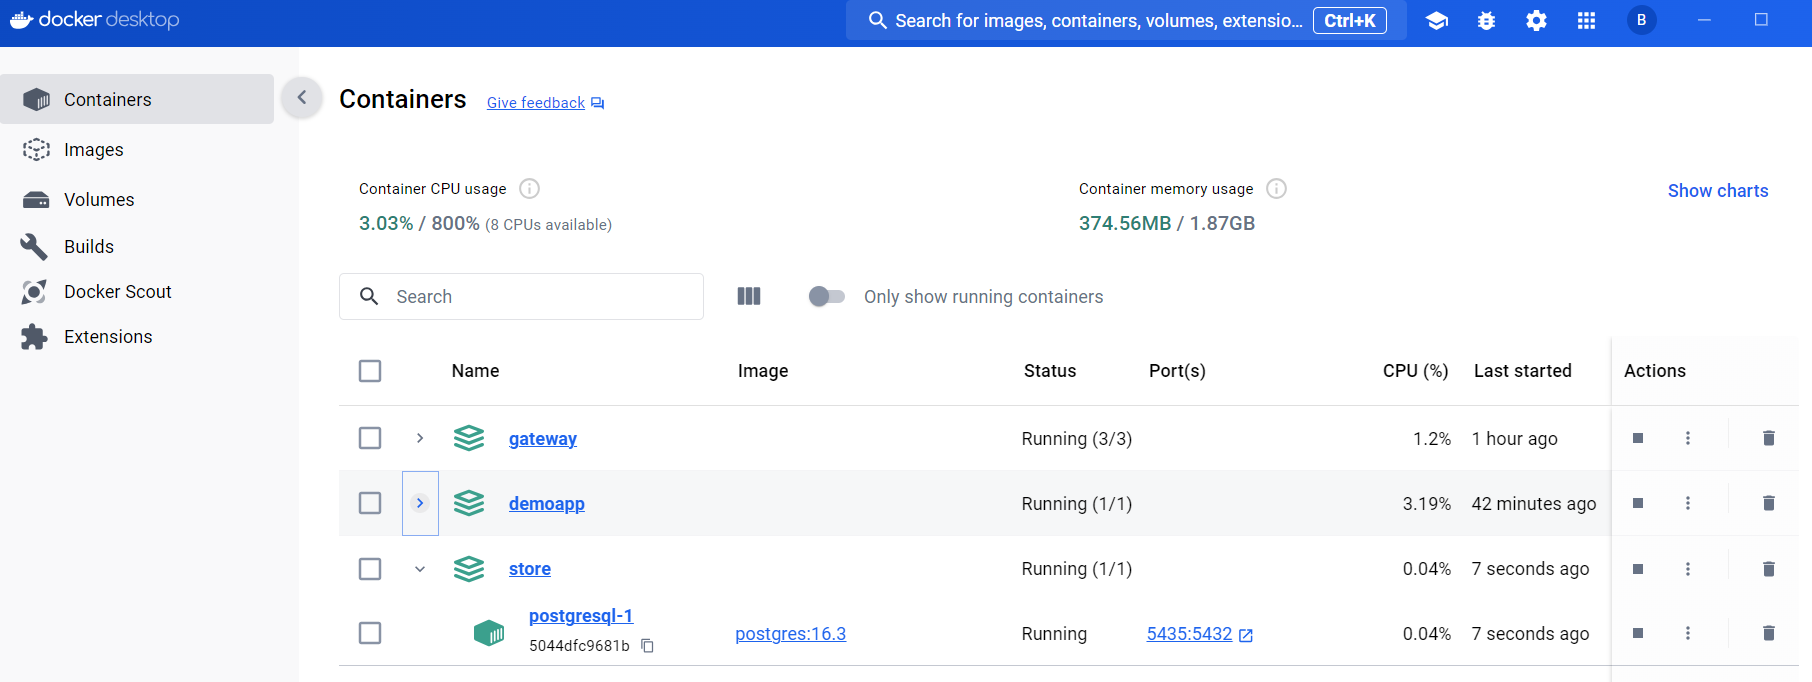
Now run the micro-service:
cd store
mvnw
If you get the error message below, be sure to specify the correct profiles:

cd store
mvnw spring-boot:run -Dspring-boot.run.profiles=dev
(Note: alterntatively you can also add the default active Spring Profile to your environment variables: SPRING_PROFILES_ACTIVE=dev)
Do the same for the gateway and the "Demo App" microservice.
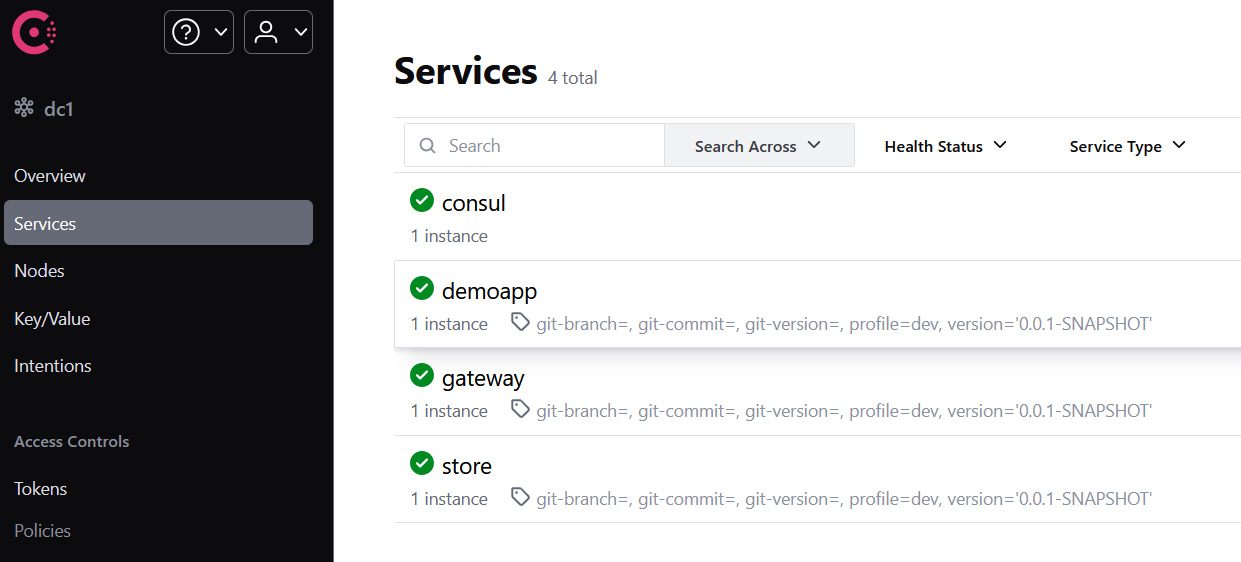
Once all the components have been started, consul should list the services as follows:
And docker should have containers running for all databases and Consul:
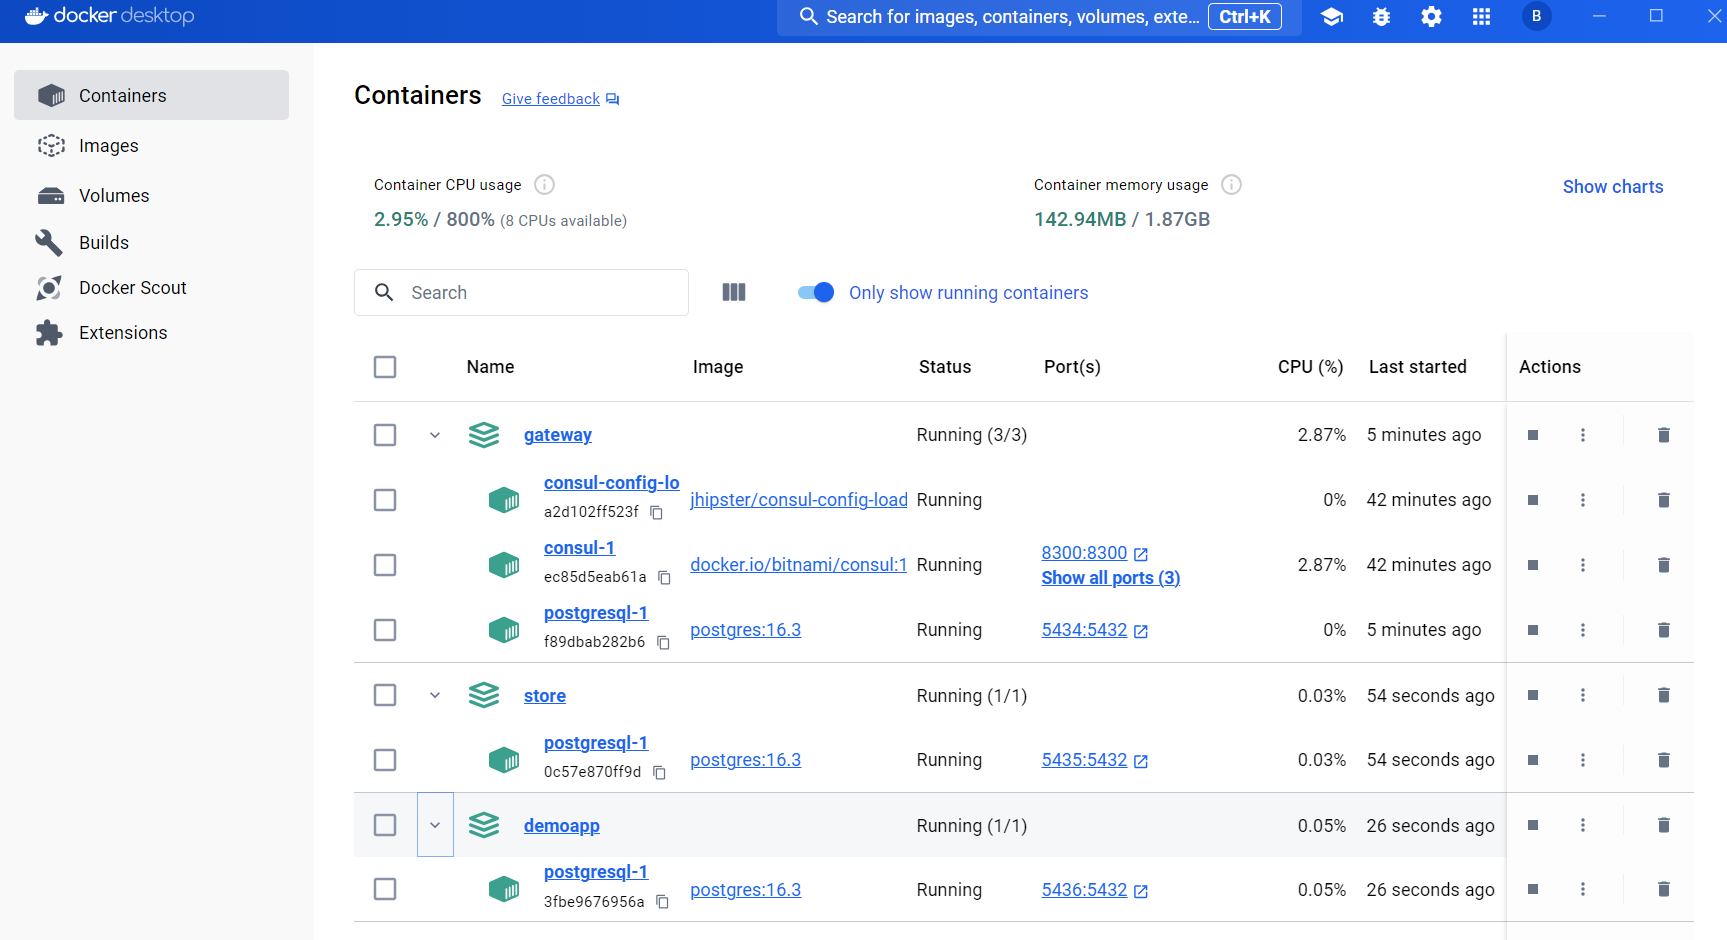
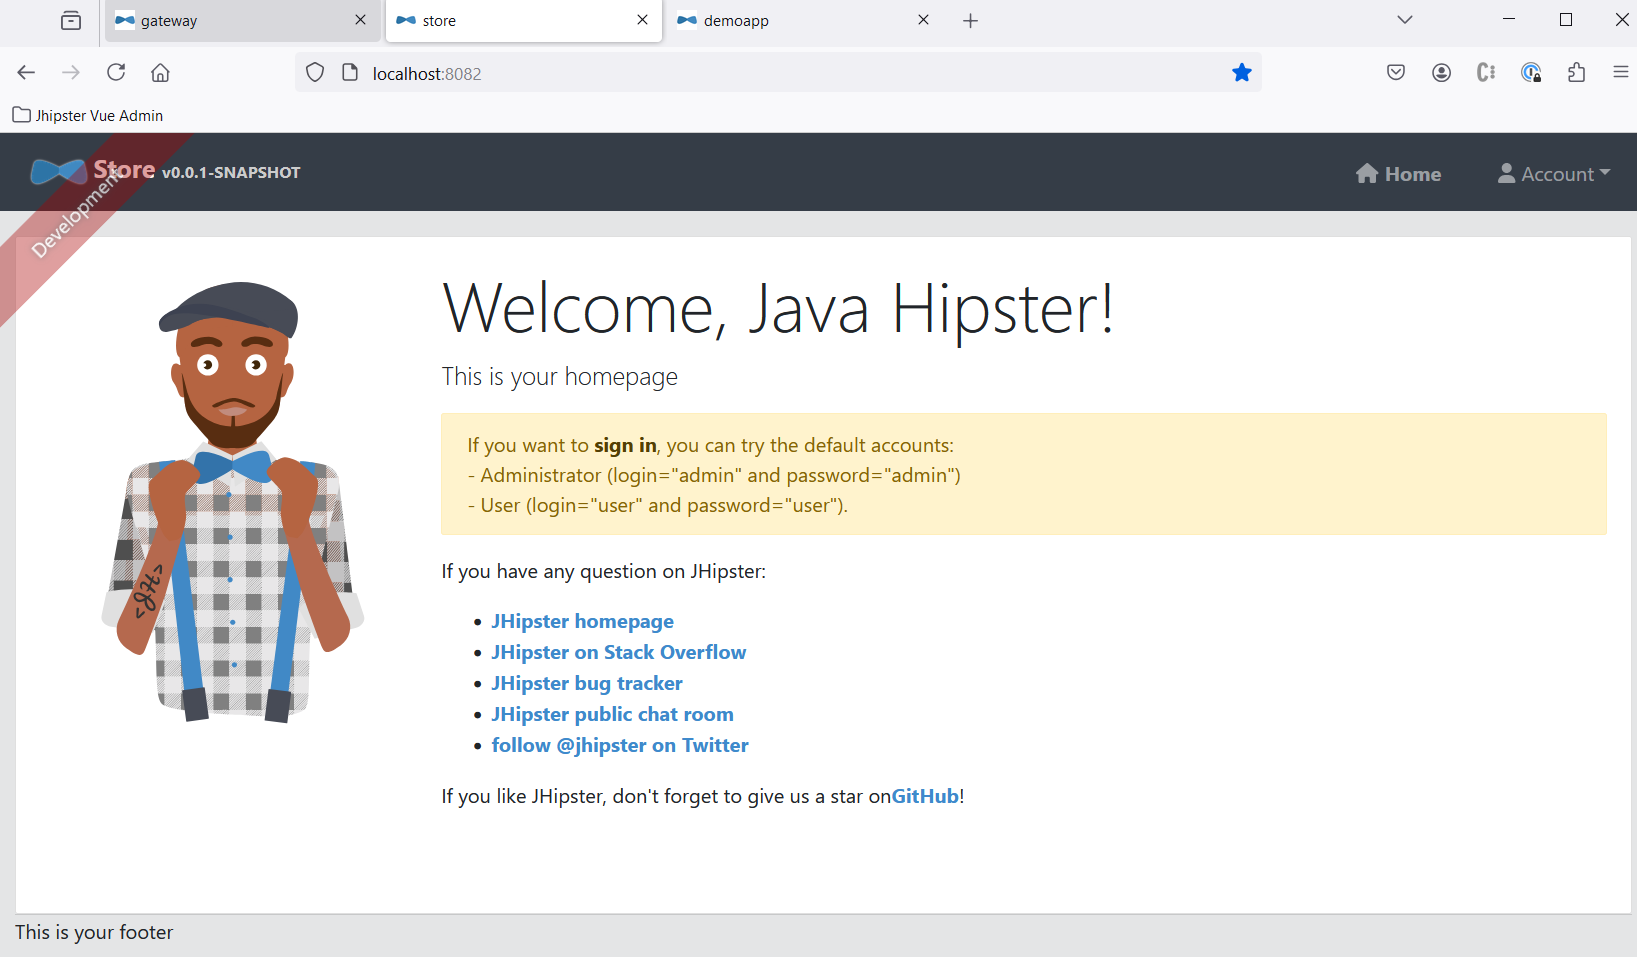
Once all the services are running: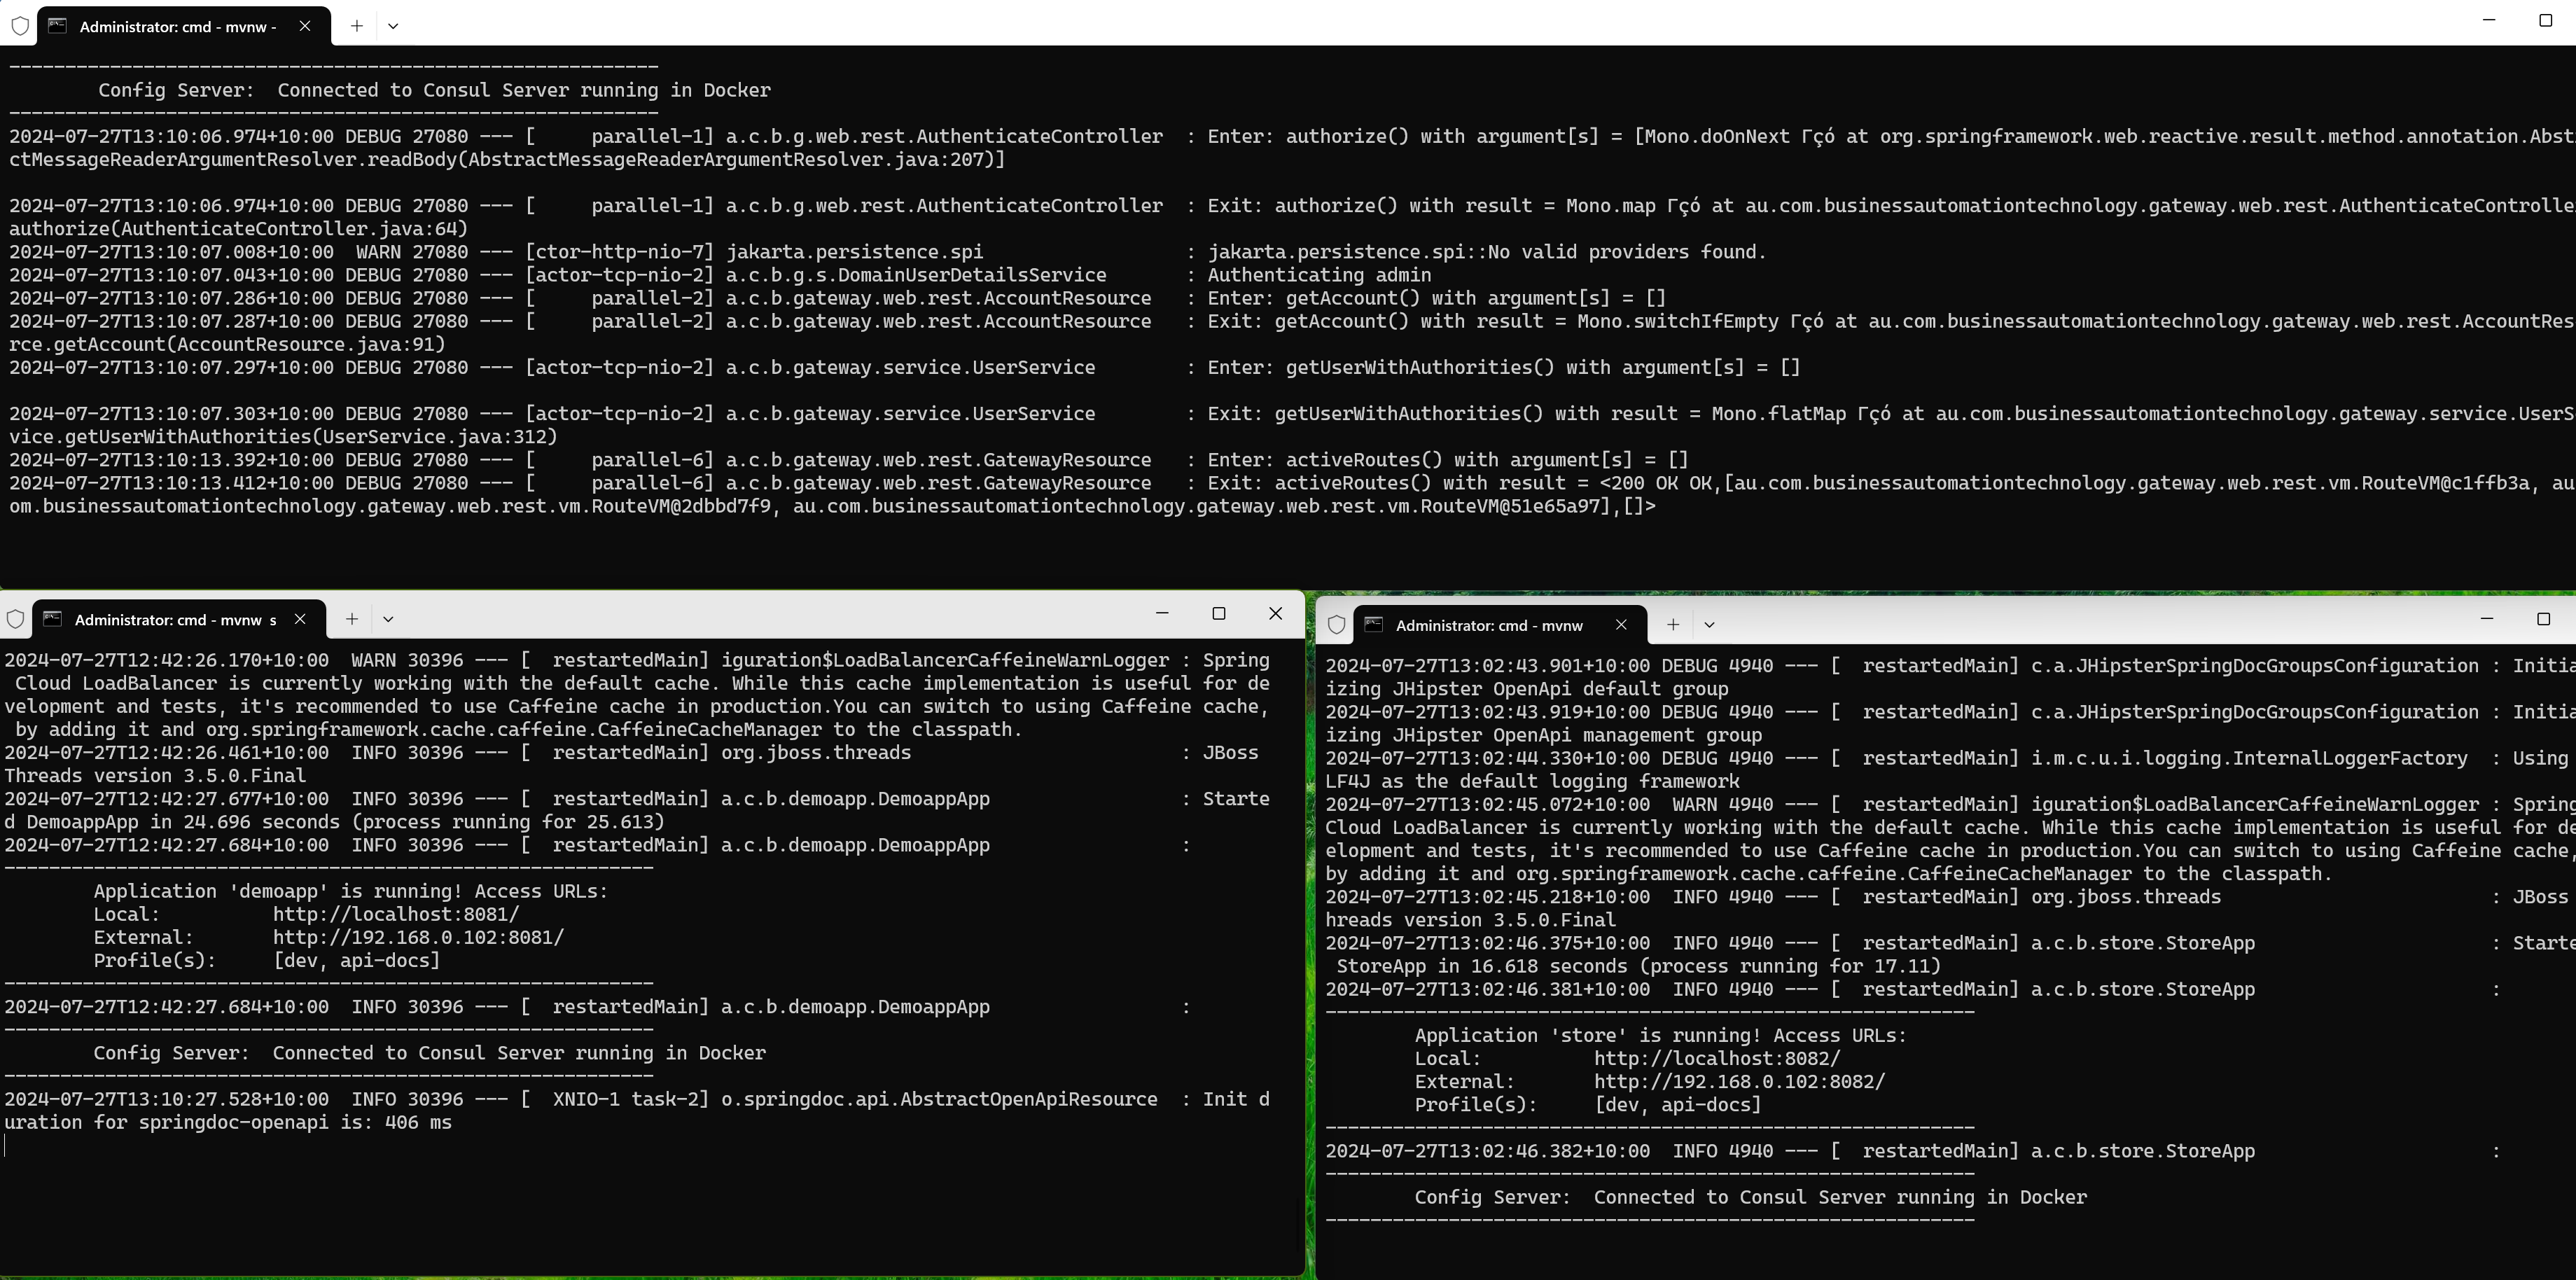
You should be able to access the micro-services from your browser:

Milestone 3: Enable Zero Turnaround UI development
To enable zero turnaround UI development, run npm start in the gateway
folder.
The following error is displayed in the browser:
To fix it, we need add the following to the WebPack configuration to
ignore Sass depreciation warnings: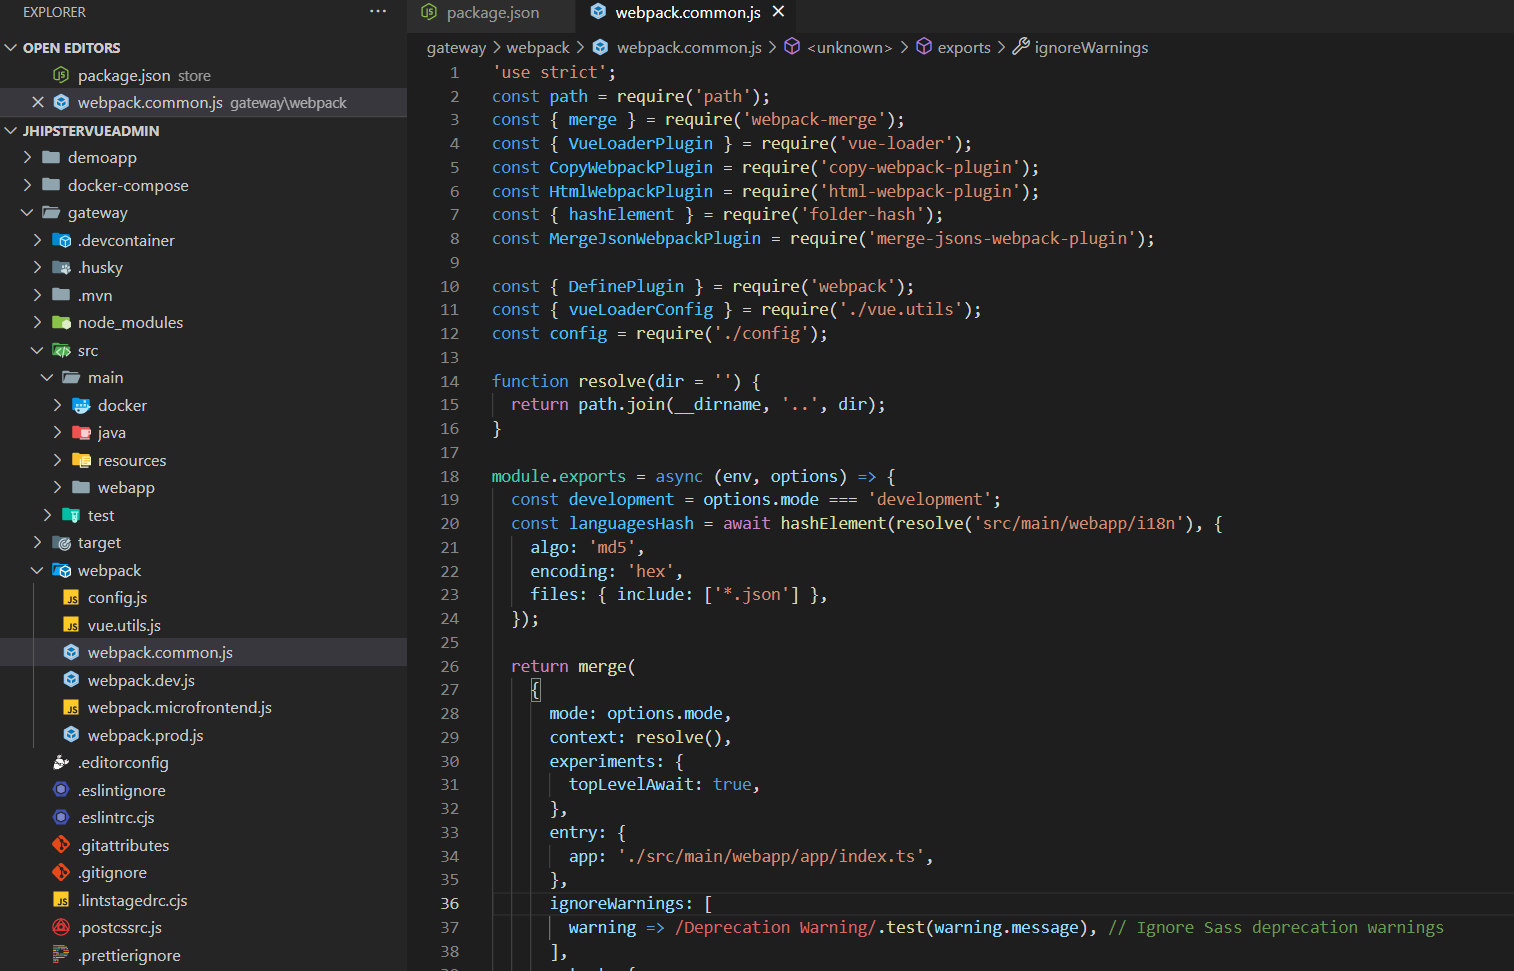
Now the Gatway can be accessed on port 9000:
In order to display the micro-service entities in the menu above, we
need to fix our security configuration in the gateway, as follows:
In the SecurityConfiguration.java file, add the following line:
.pathMatchers("/services/*/*/*.js").permitAll()
Now the menu items will display correctly: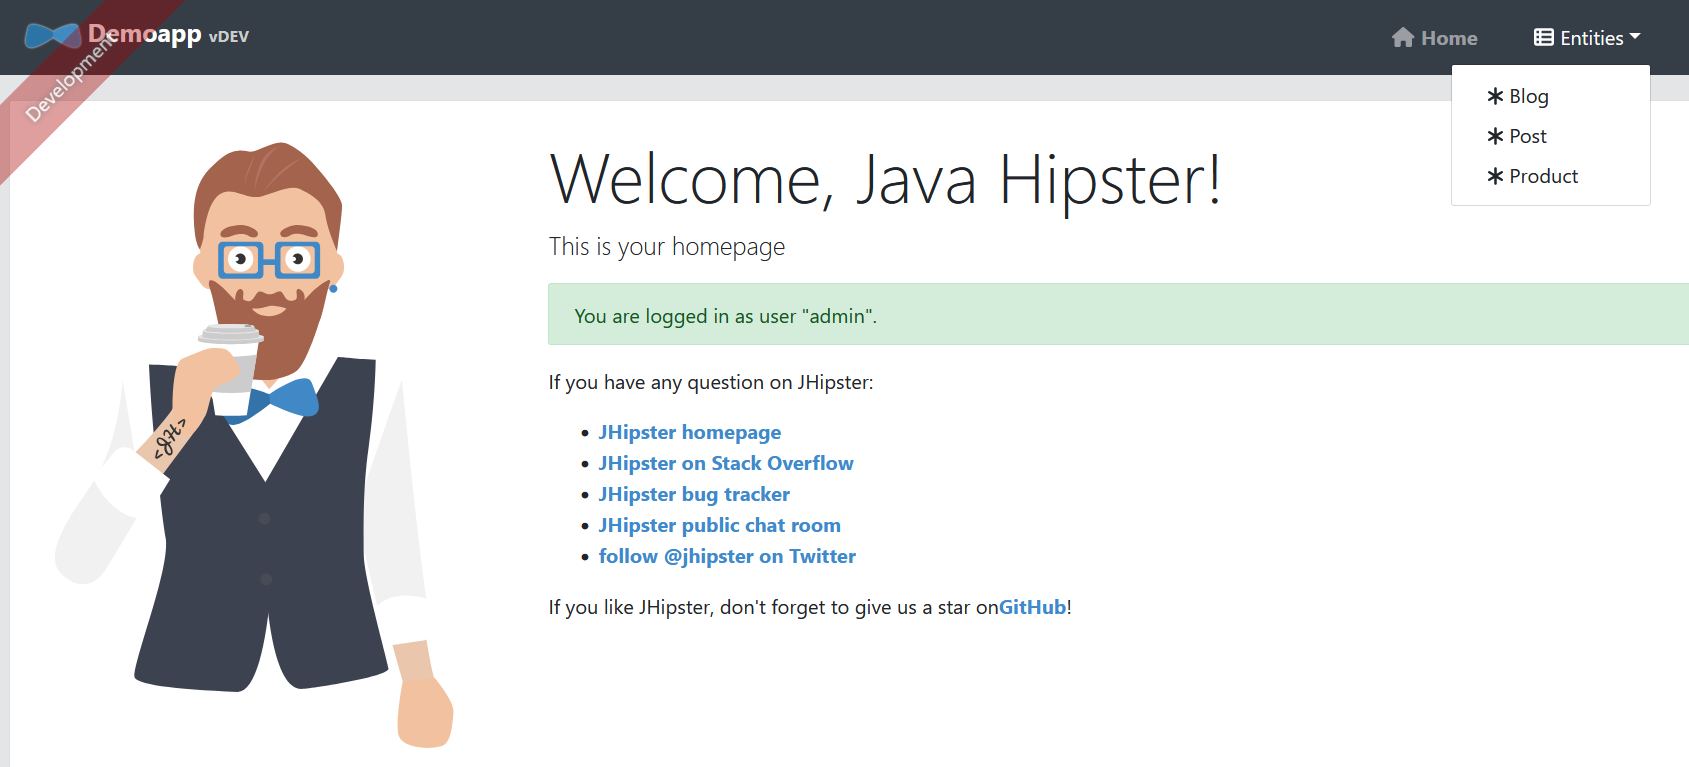
Milestone 4: Configure the front-end app
Note: The following sections some of the changes required for the initial setup of the Vue Admin -- all code changes can be reviewed in the GitHub repo.
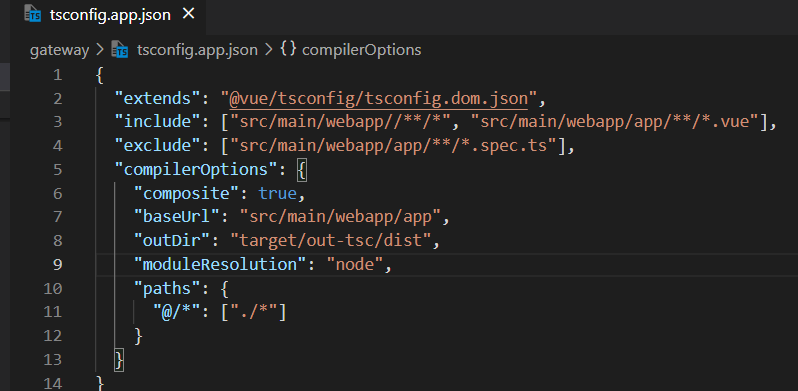
Add the following line to the tsconfig.app.json file:
"moduleResolution": "node",
Boostrap is configured in the config-bootstrap-vue.ts file, locted in the location below:
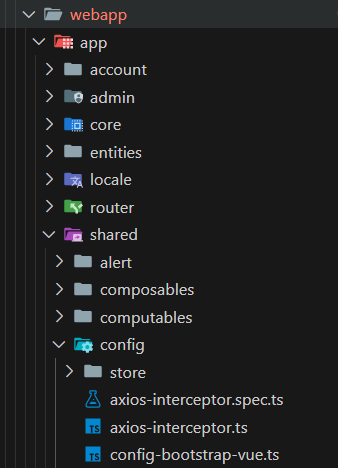
Update this file by appending:
  BImg,
  BNav,
  BSidebar,
  VBToggle,
  BFormSelect,
  BCard,
  BContainer,
  BRow,
  BCol,
  BTabs,
  BTab,
  BTooltip
  // jhcc-custom end
To the import section. Add the following:
  // jhcc-custom begin
  vue.component('b-button', BButton);
  vue.directive('bToggle', VBToggle);
  vue.component('b-sidebar', BSidebar);
  vue.component('b-img', BImg);
  vue.component('b-nav', BNav);
  vue.component('b-select', BFormSelect);
  vue.component('b-card', BCard);
  vue.component('b-row', BRow);
  vue.component('b-col', BCol);
  vue.component('b-tabs', BTabs);
  vue.component('b-tab', BTab);
  vue.component('b-container', BContainer);
  vue.component('b-tooltip', BTooltip);
  // jhcc-custom end
To the initBootStrapVue function, like this: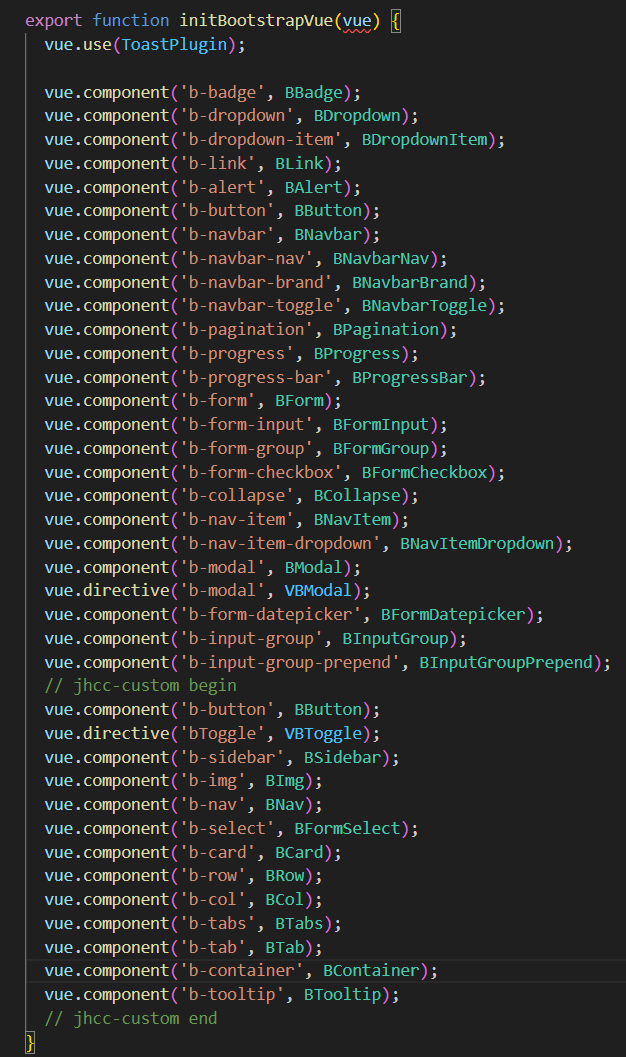
Similarly, Fontawsome needs to be configured in the config.ts file:
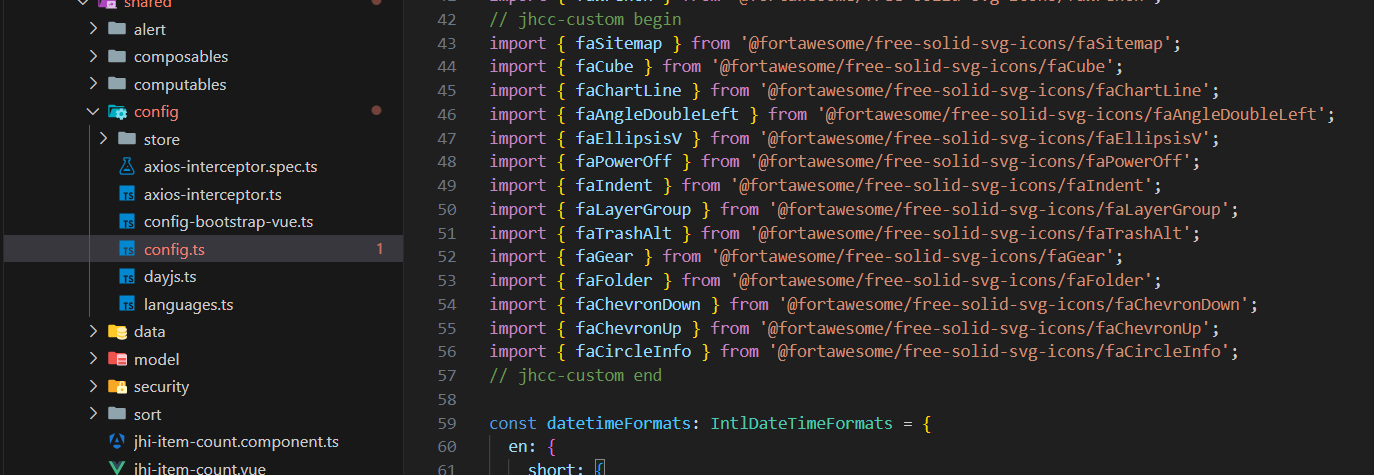
And here:
Milestone 5: Udate the Nav Bar
Now that we have the Gateway and micro services configured, our next step is to modify the styling of the application and replace the top menu with a side menu.
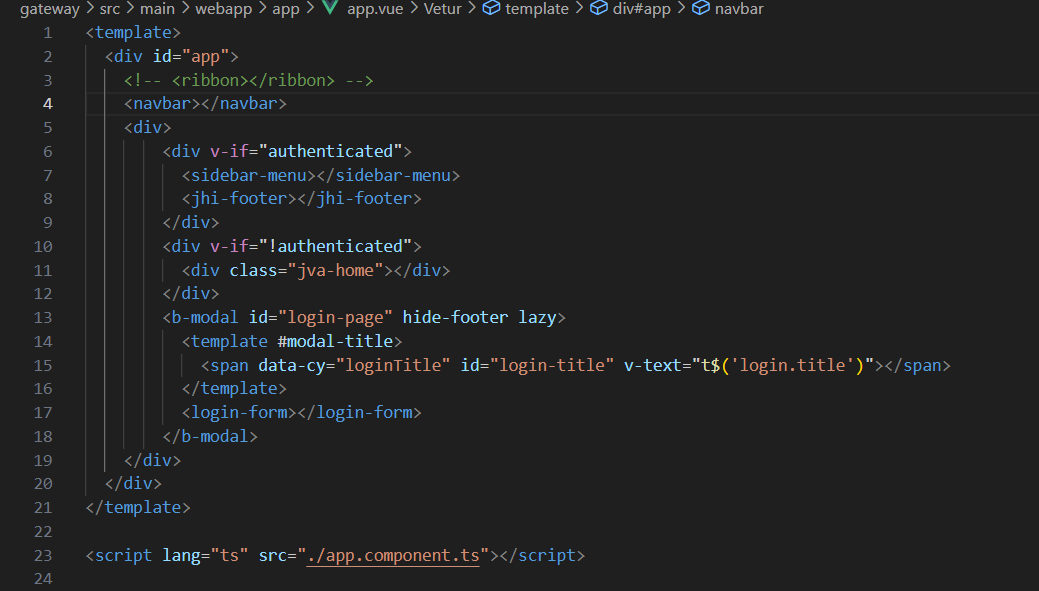
First, lets update the app.vue file to alter the main structure of our front-end appliction, like this:
Next, we need to add the modified Navbar component.
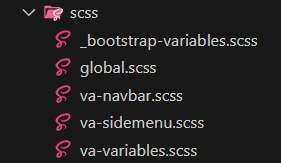
Let's create Sass files in the content.scss folder to store the styling for our variables, the navbar and the sidemen:
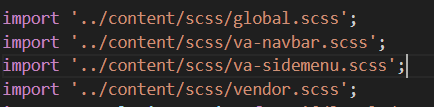
We need to update the main.ts file to include these files:
Below is the initial state of our variables file
// Navbar
$navbar-bg-color: #2C3531;

// Sidebar Menu
$sidebar-menu-bg-color: $navbar-bg-color;
$sidebar-menu-hover-bg-color: #37a473;
This allows us to easily modify the theming of our application.
The following is the styling of the navbar:
/* ==========================================================================
Navbar
========================================================================== */

@import 'va-variables';

/* jhcc-custom */
.jva-navbar {
    position: fixed !important;
    top: 0;
    right: 0;
    left: 0;
    z-index: 1000;
    background-color: $navbar-bg-color;
    height: 2.5rem;
    padding: 0rem !important;
    justify-content: start;
  }

  /* ==========================================================================
      Title
      ========================================================================== */

  .navbar-title {
    display: inline-block;
    vertical-align: middle;
    font-weight: lighter;
    color: white;
    margin-left: 0.5rem;
  }

  .jhipster-title {
    font-size: larger;
  }

  .navbar-version {
    font-size: 10px;
    vertical-align: sub;
    color: white;
  }

  .navbar-dark button {
    color: white;
  }

  .icon-sidebar {
    display: inline-block;
    margin-left: 10px;
  }

  /* ==========================================================================
      Logo styles
      ========================================================================== */
  .navbar-brand.logo {
    padding: 2px 2px;
  }

  .logo .logo-img {
    height: 25px;
    display: inline-block;
    vertical-align: middle;
    width: 30px;
  }

  .logo-img {
    height: 100%;
    background: url('../../../content/images/icon.png') no-repeat center center;
    background-size: contain;
    width: 100%;
    filter: drop-shadow(0 0 0.05rem white);
  }

  .sign-out {
    color: white;
    display: flex;
    margin-left: auto;
    padding-right: 2rem;
    cursor: pointer; /* Change cursor to pointer */
    padding: 0.5rem 1rem; /* Add padding for button-like appearance */
    background-color: #2C3531; /* Optional: background color */
    border: none; /* Optional: remove default border */
    border-radius: 5px; /* Optional: rounded corners */
    align-items: center; /* Center content vertically */
    text-decoration: none; /* Remove underline from text, if any */
  }

  .sign-out:hover {
    background-color: #565a5e; /* Optional: darker background on hover */
  }

  .sign-in {
    color: white;
    display: flex;
    margin-left: auto;
    padding-right: 2rem;
    cursor: pointer; /* Change cursor to pointer */
    padding: 0.5rem 1rem; /* Add padding for button-like appearance */
    background-color: $navbar-bg-color; /* Optional: background color */
    border: none; /* Optional: remove default border */
    border-radius: 5px; /* Optional: rounded corners */
    align-items: center; /* Center content vertically */
    text-decoration: none; /* Remove underline from text, if any */
  }

  .sign-in:hover {
    background-color: #565a5e; /* Optional: darker background on hover */
  }
Milestone 6: Add example pages and configure the router
This sections provides us with some items to display in our menu.
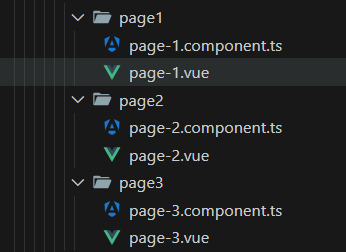
Create a folder called "pages" under the "app" folder, and add 3 page folders, as follows:

For every page, add a vue and script component, as follows:
We will keep the content of the pages simple for now:
<template>
  <div>
    <h1>Page 1</h1>
  </div>
</template>

<script lang="ts" src="./page-1.component.ts"></script>
And:
import { defineComponent} from 'vue';

export default defineComponent({
  compatConfig: { MODE: 3 },
  name: 'Page-1',
  components: {
  },
  setup() {
    console.log("Page 1 component setup")
  },
  methods: {
  },
});

>
</style>
Milestone 7: Add side menu-bar
We will modify the extend the Jhipster menu bar for this milestone.
To get rid of the error messages below, we first need to add @types/jsdom to the package.json file.
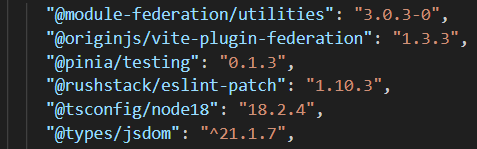
After adding the line above, run npm intall for it to take effect.
This is the basic structure of the side menu.
<template>
  <div>
    <div :class="['sidebar', { active: isActive }]" v-if="hasAnyAuthority('ROLE_ADMIN')">
    <div class="menu-toggle-button">
      <div id="btn"  @click="toggleSidebar">
        <font-awesome-icon class="jva-icon" :icon="['fas', 'bars']"/>
      </div>
    </div>
    <ul>
      <li>
        <div class="menu-item" @click="$router.push({ name: 'Home' })">
          <font-awesome-icon class="jva-icon" icon="home" />
          <span class="nav-item">Home</span>
        </div>
        <span class="tooltip">Home</span>
      </li>
    </ul>
  </div>
  <div class="main-content">
      <div class="jva-container">
        <router-view></router-view>
      </div>
  </div>
  </div>
</template>
Next, we expand on the basic structure to display our test pages. We also add conditional styling to ensure an active menu item is highlighted.
<template>
  <div>
    <div :class="['sidebar', { active: isActive }]" v-if="hasAnyAuthority('ROLE_ADMIN')">
    <div class="menu-toggle-button">
      <div id="btn"  @click="toggleSidebar">
        <font-awesome-icon class="jva-icon" :icon="['fas', 'bars']"/>
      </div>
    </div>
    <ul>
      <li :class="{ active: $route.path === '/' }">
        <div class="menu-item" @click="$router.push({ name: 'Home' })">
          <font-awesome-icon class="jva-icon" icon="home" />
          <span class="nav-item">Home</span>
        </div>
        <span class="tooltip">Test Page 1</span>
      </li>
      <li :class="{ active: $route.path === '/page1' }">
        <div class="menu-item" @click="$router.push({ name: 'Page1' })">
          <font-awesome-icon class="jva-icon" icon="gear" />
          <span class="nav-item">Test Page 1</span>
        </div>
        <span class="tooltip">Test Page 1</span>
      </li>
      <li :class="{ active: $route.path === '/page2' }">
        <router-link to="/page2" class="menu-item">
          <font-awesome-icon class="jva-icon" icon="user" />
          <span class="nav-item">Test Page 2</span>
        </router-link>
        <span class="tooltip">Test Page 2</span>
      </li>
      <li :class="{ active: $route.path === '/page3' }">
        <router-link to="/page3" class="menu-item">
          <font-awesome-icon class="jva-icon" icon="sitemap" />
          <span class="nav-item">Test Page 3</span>
        </router-link>
        <span class="tooltip">Test Page 3</span>
      </li>
    </ul>
  </div>
  <div class="main-content">
      <div class="jva-container">
        <router-view></router-view>
        <!-- <jhi-footer></jhi-footer>  -->
      </div>
  </div>
  </div>
</template>

<script lang="ts" src="./sidebar-menu.component.ts"></script>
We now have to style our side menu. First create a scss file called
va-sidemenu.scss in the content.scss folder:
To view a tutorial on how to build a simple resonsive sidebar menu, check out this video: https://www.youtube.com/watch?v=uy1tgKOnPB0&t=1388s
Below is the styling of the menu:
@import 'va-variables';

.sidebar {
    box-sizing: border-box;
    position: fixed;
    top: 2.5rem; /* Adjusted to be below a navbar of height  */
    left: 0px; /* Assuming this is the intended left position */
    height: calc(100vh - 2.5rem); /* Adjusted to accommodate the navbar's height */
    background-color: $sidebar-menu-bg-color;
    transition: all 0.5s ease;
    z-index: 1;
    overflow-y: auto; /* Enable vertical scrolling */
    overflow-x: hidden; /* Prevent horizontal scrolling */
    width: 3.5rem;
  }

  .sidebar.active {
    width: 250px;
  }

  .sidebar .menu-toggle-button {
    margin-bottom: 3rem;
  }

  .sidebar #btn {
    position: absolute;
    color: #fff;
    top: 0.4rem;
    left: 1.4rem;
    font-size: 1.2rem;
    line-height: 50px;
    transform: translateX(-50%);
    cursor: pointer;
  }

  .sidebar ul {
    padding-left: 0;
    margin-top: 1rem;
  }

  .sidebar ul li {
    position: relative;
    list-style-type: none;
    height: 50px;
    width: 90%;
    line-height: 50px;
    padding-left: 0.5rem;
  }

  .sidebar ul li:hover,
  .sidebar ul li.active {
    background-color: $sidebar-menu-hover-bg-color;
    color: white;
    border-radius: 0.8rem;
  }

  .jva-icon {
    text-align: center;
    line-height: 2rem;
    border-radius: 12px;
    padding: 7px;
  }

  .toggle-arrow {
    margin-left: auto; /* Push the arrow to the right */
    cursor: pointer; /* Show pointer cursor on hover */
  }

  .sidebar .menu-item {
    color: #D1E8E2;
    display: flex;
    align-items: center;
    text-decoration: none;
    border-radius: 0.8rem;
    min-height: 50px;
    width: 2.5rem;
  }

  .sidebar.active .menu-item {
    width: 100%;
  }

  .sidebar .menu-item-parent {
    color: #D1E8E2;
    display: flex;
    align-items: center;
    text-decoration: none;
    min-height: 50px;
    width: 2.5rem;
  }

  .sidebar .menu-item-child {
    color: #D1E8E2;
    display: flex;
    align-items: center;
    text-decoration: none;
    border-radius: 0.8rem;
    padding-left: 1.5rem; /* Adjust this value for the desired indentation */
  }

  .sidebar.active .menu-item-child:hover {
    background-color: $sidebar-menu-hover-bg-color;
    color: white
  }

  /* Control displaying menu descriptions when menu is expanded */
  .sidebar .nav-item {
    display: none; /* Hide the nav items when the sidebar is minimized */
    white-space: nowrap; /* Prevent text from wrapping */
  }

  .sidebar.active .nav-item {
    display: block; /* Show the nav items when the sidebar is expanded */
  }

  .sidebar .jva-icon-toggle {
    display: none;
  }

  .sidebar.active .jva-icon-toggle {
    display: block; /* Show the nav items when the sidebar is expanded */
    min-width: 40px;
    text-align: center;
    line-height: 2rem;
    border-radius: 12px;
  }

  /* Tooltip */
  .sidebar ul li .tooltip {
    color: #D1E8E2;
    background-color: #0d0e0d;
    position: relative;
    left: 9rem;
    top: 50%;
    transform: translate(-50%, -50%);
    box-shadow: 0 0.5rem 0.8rem rgba(0, 0, 0, 0.1);
    border-radius: 0.6rem;
    padding: 0.4rem 1.2rem;
    z-index: 20; /* Ensure the tooltip has a higher z-index */
    opacity: 0;
    pointer-events: none; /* Ensure it doesn't interfere with other elements */
    transition: opacity 0.3s; /* Add transition for better UX */
    white-space: nowrap; /* Prevent text from wrapping */
    display: block; /* Keep the text in a single line */
    text-align: left; /* Align text to the left */
    min-width: 10rem;
  }

  .sidebar ul li:hover .tooltip {
    opacity: 1;
  }

  .sidebar.active ul li .tooltip {
    display: none;
  }

  /* Control display size of main content area, based on menu extended or not*/
  .main-content {
    position: relative;
    top: 2.5rem;
    left: 3.5rem;
    width: 100%;
    height: 100%;
    transition: all 0.5s ease;
    width: calc(100% - 3.5rem);
  }

  .sidebar.active ~ .main-content {
    left: 250px;
    transition: all 0.5s ease;
    width: calc(100% - 250px);
  }

  .sidebar.active ~ .main-content {
    left: 250px;
    transition: all 0.5s ease;
    width: calc(100% - 250px);
  }

  .jva-container {
    position: relative;
    padding: 2rem;
  }
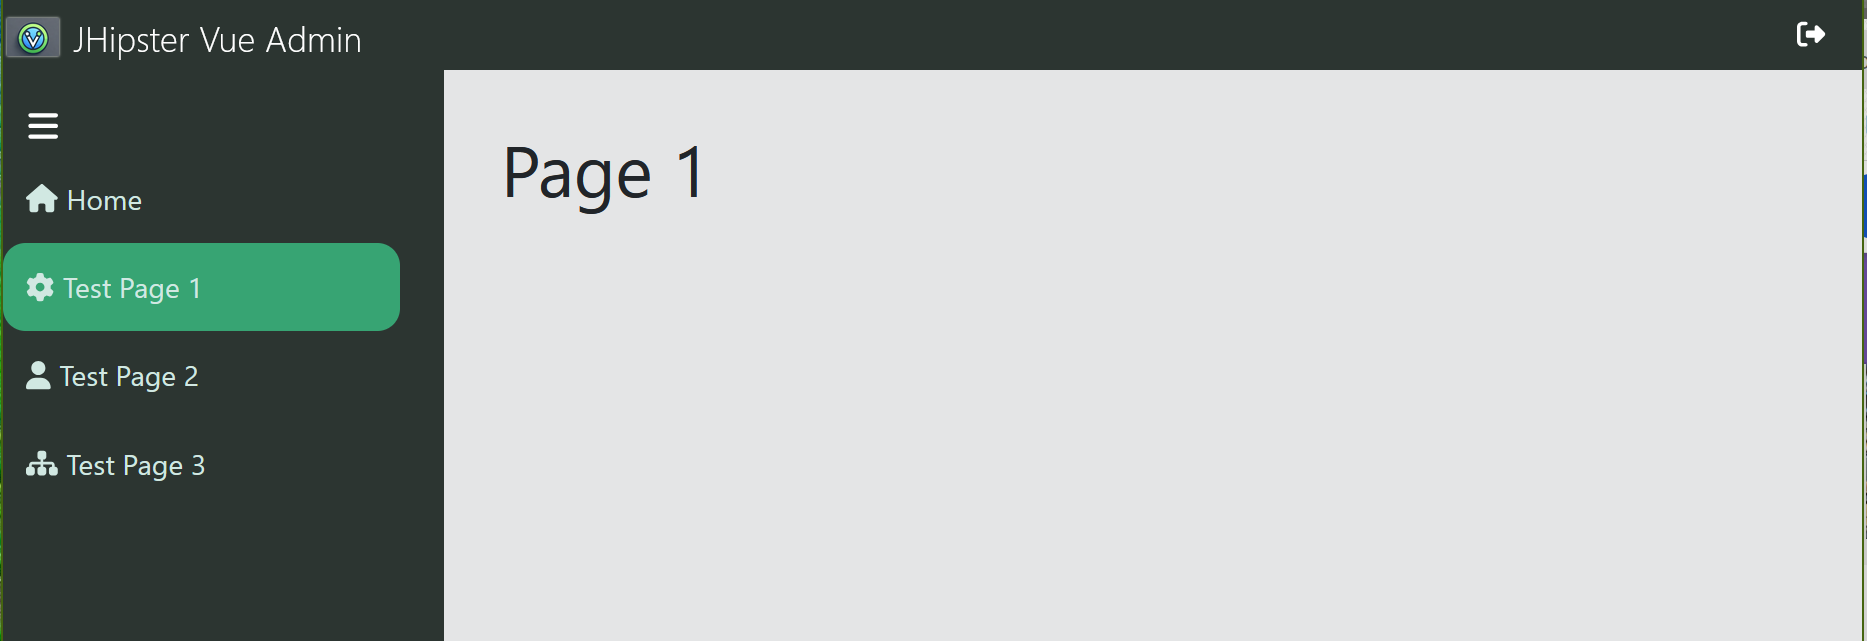
After completing the steps above, we should have a properly styled side menu in place:
Milestone 8: Configure Micro-Frontend integration into menu
In this milestone we will integrate the MicroFrontends of our two micro-services into the admin container.
We need to modify the entities menu that JHipster generated for the
micro-service. The path to the entities-menu file is as follows: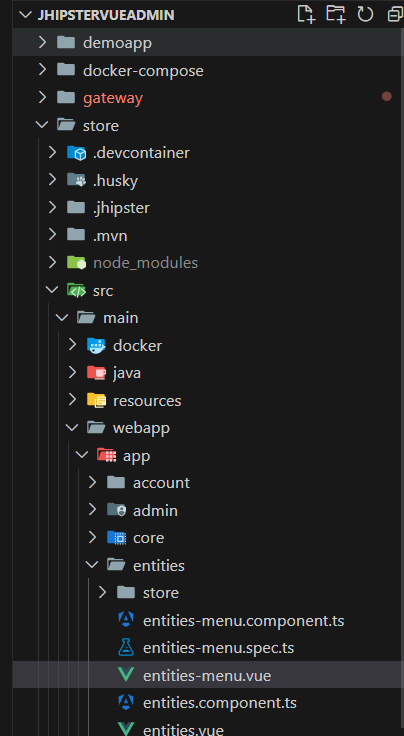
The existing state is as follows:
<template>
  <div>
    <b-dropdown-item to="/store/product">
      <font-awesome-icon icon="asterisk" />
      <span v-text="t$('global.menu.entities.storeProduct')"></span>
    </b-dropdown-item>
    <!-- jhipster-needle-add-entity-to-menu - JHipster will add entities to the menu here -->
  </div>
</template>

<script lang="ts" src="./entities-menu.component.ts"></script>
We will update it to the following:
<template>
  <div>
    <li :class="{ active: $route.path === '/store/product' }">
      <router-link to="/store/product" class="menu-item">
        <font-awesome-icon icon="asterisk" />
        <span class="nav-item" v-text="t$('global.menu.entities.storeProduct')"></span>
      </router-link>
    </li>
    <!-- jhipster-needle-add-entity-to-menu - JHipster will add entities to the menu here -->
  </div>
</template>

<script lang="ts" src="./entities-menu.component.ts"></script>
This ensures that active items are highlighted, and it makes use of router-link to configure routing and handle the active state.
Note, we need to restart the back-end for the Store microservice for this to take effect. Navigate to the store folder and run mvnw.
Repeat above for the other microservice -- demoapp.
Now, we need to add the following section to the sidemenu file to display the microservice menu items:
      <!-- Micro Frontends Entities menu -->
      <li>
        <div class="menu-item-parent"@click="toggleEntities">
          <font-awesome-icon class="jva-icon" icon="folder">
          <span class="nav-item">Entities</span>
          <font-awesome-icon class="jva-icon-toggle" :icon="entitiesIcon" @click="toggleEntities">
        </div>
        <span class="tooltip">Entities</span>
      </li>
      <div v-show="entitiesVisible">
        <demoapp-entities-menu
:is-active="isActive"></demoapp-entities-menu>
        <store-menu :is-active="isActive"></store-menu>
      </div>
At this point, the application should look like this: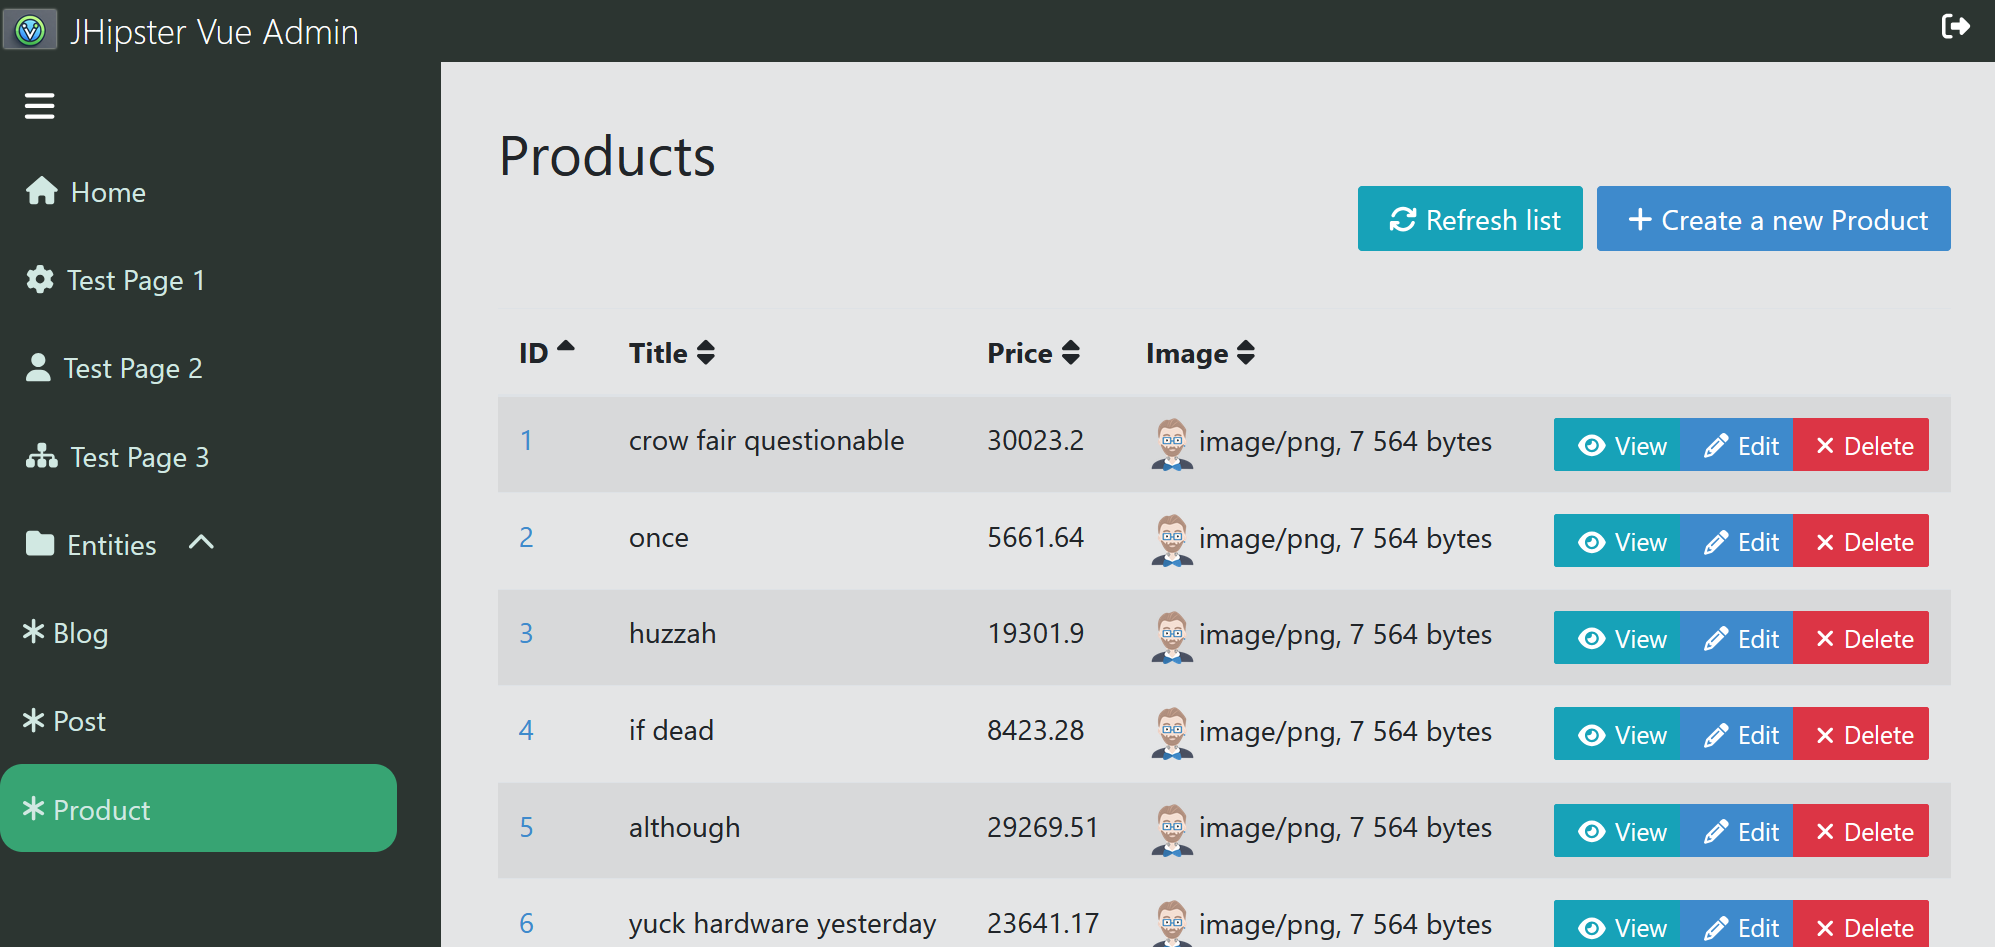
Milestone 9: Add the Admin menu section
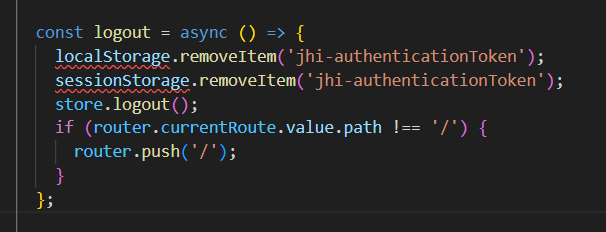
In this milestone we add the basic admin features available to a standard Jhipster application back to the menu structure. We also add a log out button and add a footer. Refer to the code in the git repo for details on implementing this.
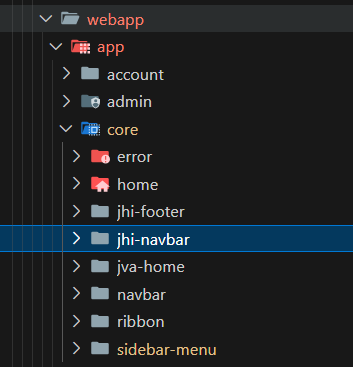
Milestone 10: Tidy up
We can delete the jhi-navbar folder as we no longer need it.
After completing all the mile-stones our application looks like this:
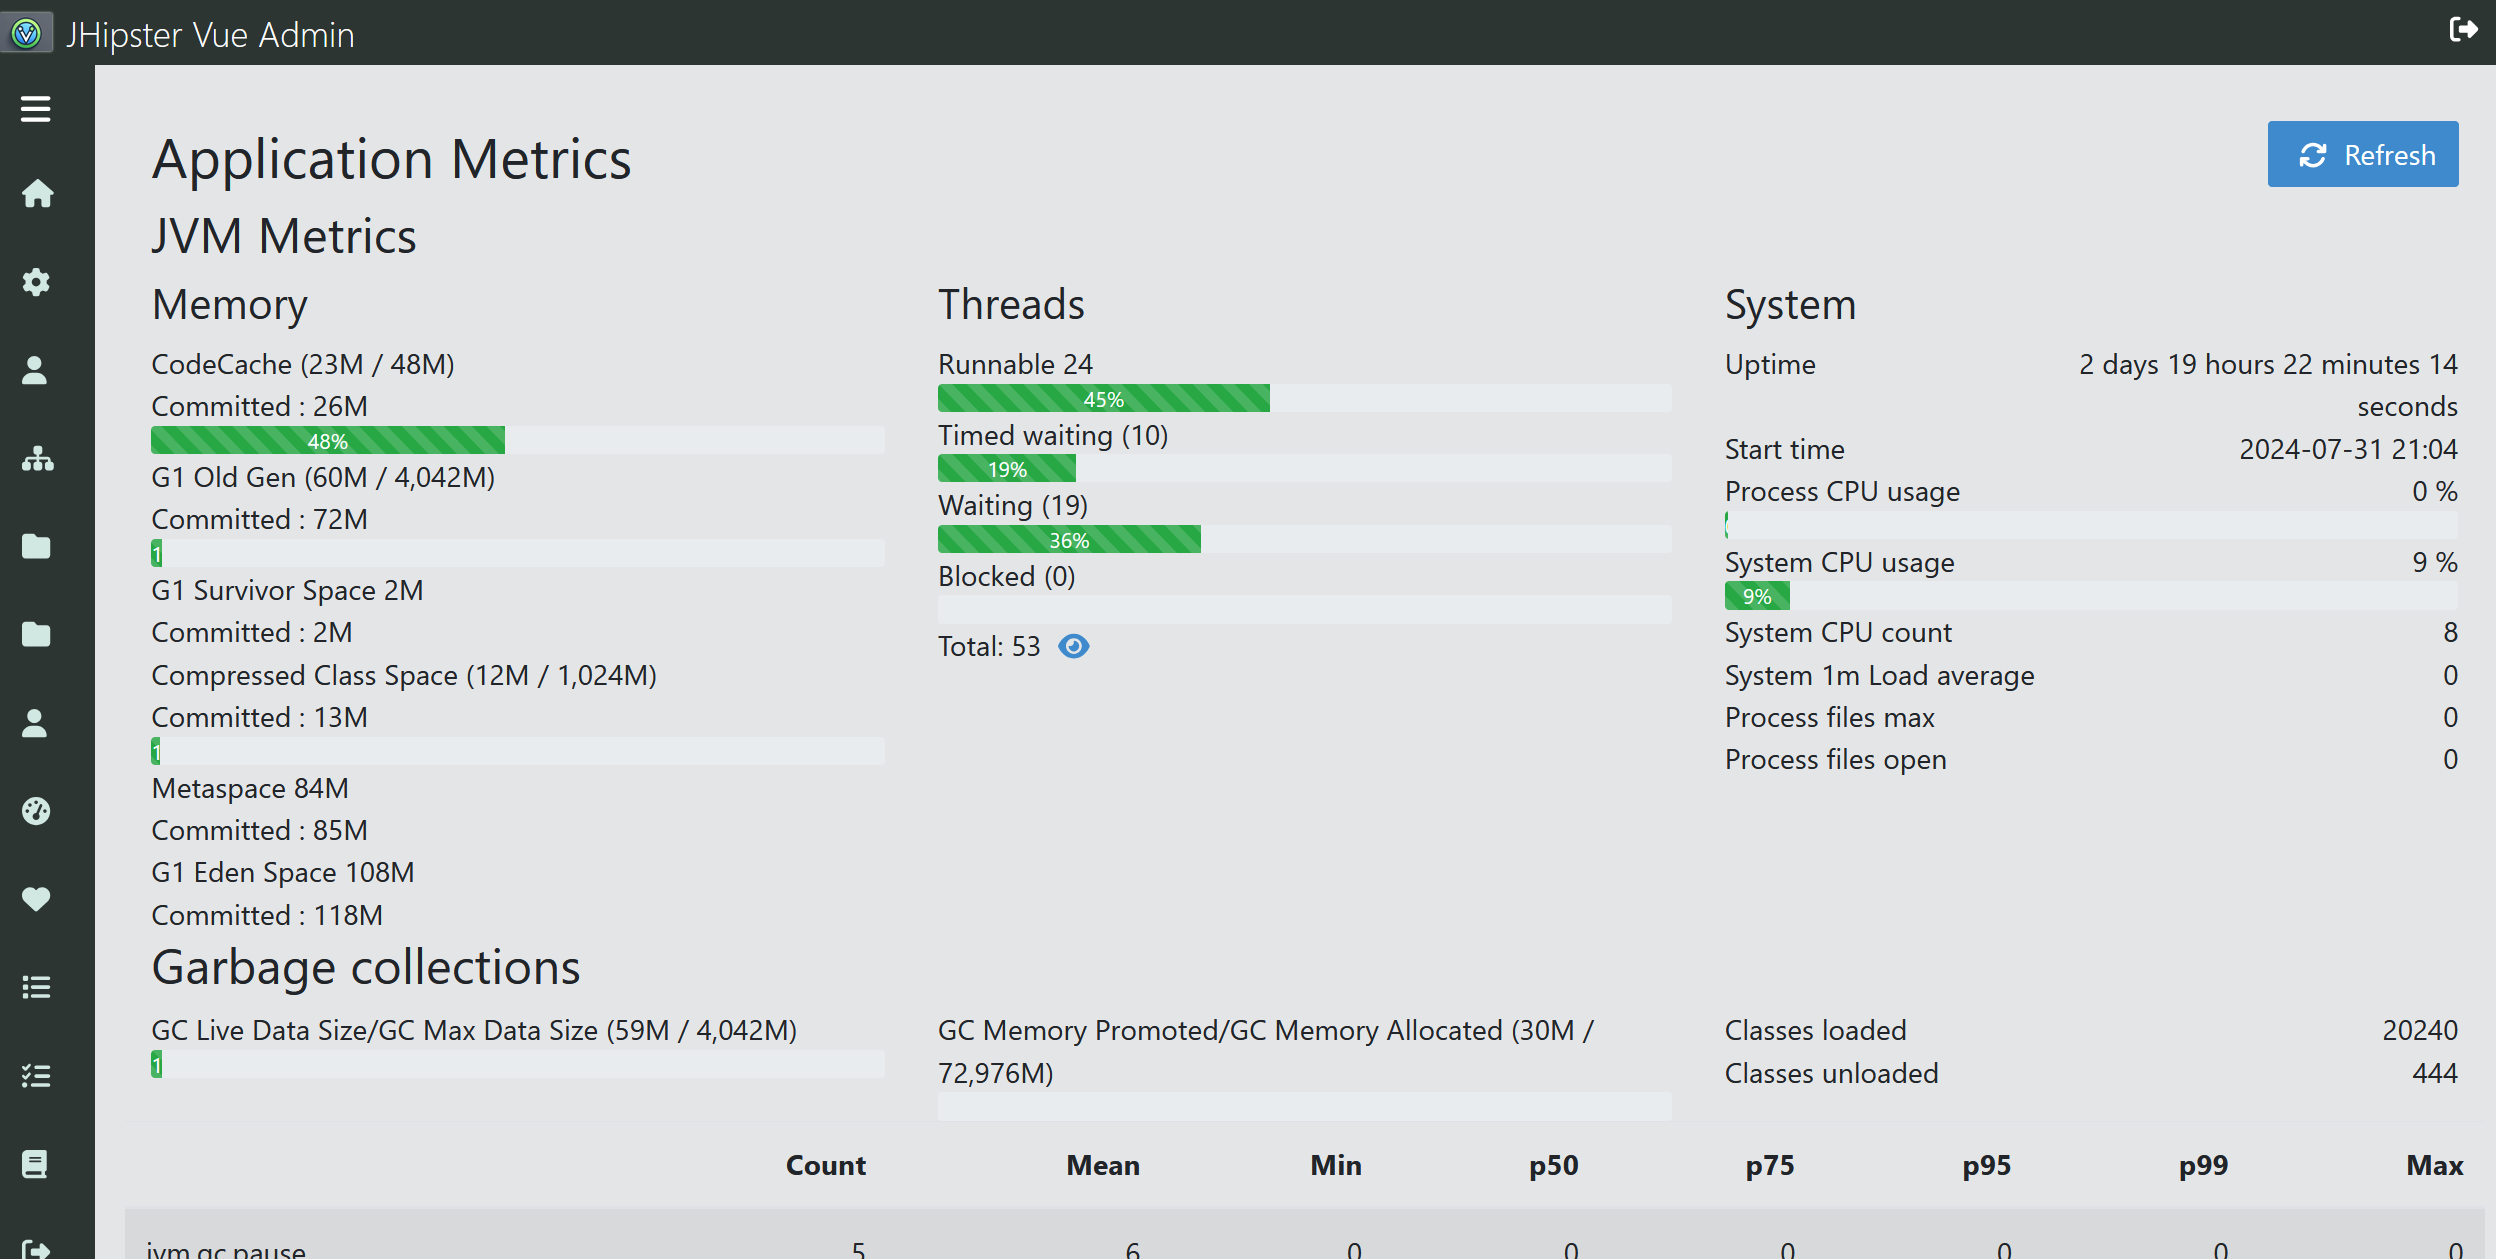
Using this as basis, we will add common UI components that are typically found in a front-end Admin scaffolding application.